I pinned this wall idea awhile ago, but didn't have a lot of space at our old apartment.
Now that we moved we have ridiculous amounts of wall space plus vaulted ceilings so I finally have space to do it!
I've been trying to think of decently cheap ways to decorate since I know we probably wont be here more than a year or two. This project cost me $25, but you could do it even cheaper if you already have some of the stuff.
I was originally going to do something different with the space so I bought frames roughly the same size. If I do this again at another place I'll probably add some different size frames in the mix.
First off, I printed out pictures that I wanted to use in a mix of 5x7 and 4x6. I had a coupon so I got all the photos for $8. If you use pictures you already have you're doing it that much cheaper!
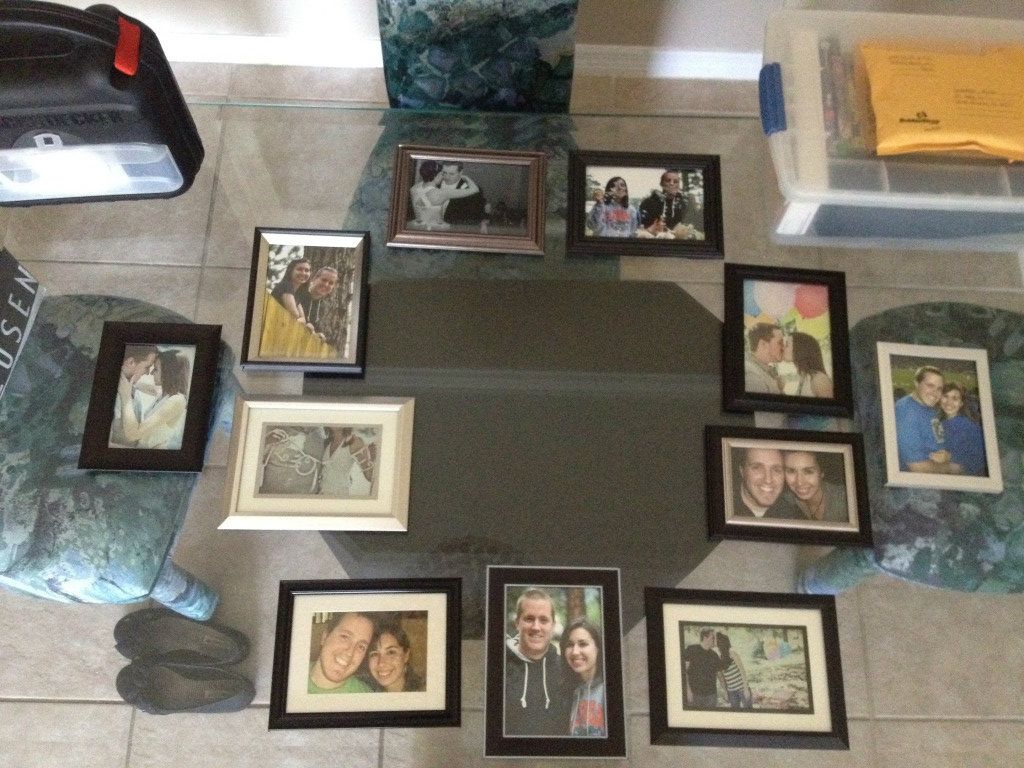
Next, I went and picked out some cheap frames. We didn't have any extras to use, but the dollar store by us had a ton of cute ones! I picked out 11 different frames to use. I wanted all of them to have different looks, but still be able to go together. $11 for frames for all of you keeping track!
Once I got them home I played around with the photos and frames trying to decide which pictures I wanted in what frame.
 |
| Before I changed my mind on what I was doing! |
Then I decided to add some wood pieces to the collage. I found the large wooden "D" at Michael's for $4 and bought paint in light blue and dark brown to match our bedroom for $1.
I wanted to add some other pieces to balance out the letter, but after searching everywhere and not finding anything I liked I decided to leave it as is. Hopefully I'll find some more pieces to add later on down the road!
I wanted to add some other pieces to balance out the letter, but after searching everywhere and not finding anything I liked I decided to leave it as is. Hopefully I'll find some more pieces to add later on down the road!

Paint your wood pieces! This was one of those white letters from Michael's so I knew I wanted it to match our room since that was where I was going to put it! It took two coats!

I spent a lot of time re-arranging to make sure that it was exactly how I wanted it. I didn't want any of the silver frames next to each other. I also wanted the different events to be spread out. I had three from our vacation and four from our engagement photos in the mix.
Take a picture of what it looks like once you decide! I was constantly looking back at the picture to make sure I was putting all of the pictures where I wanted them!
The next part is the hardest! I didn't wait for hubs to get home because I was so antsy to get it on the wall. Therefore, I had to do all the hanging by myself, which I hate since I can't make sure it's straight!
First, I measured the wall and marked the center. Then I measured my pictures arrangement to make sure that the center of my layout would in centered on the wall. I started with the bottom and slowly worked my way up hanging each picture to make sure that it was where I wanted it before I hung the next one. You can also cut out paper the same size as each of the frames and tape it up on the wall so you can play with it.

I'm pretty happy with how it turned out, but I know later I'll want to add some larger frames so it fills up more of the wall.


Love it! I especially love the painted D. I want to do something like that!
ReplyDeleteThis is a genius idea!! I have a ton of odd and end pics I need to arrange somehow! Thanks for linking up with us! :)
ReplyDeletevery cute! i love it! I can't wait to do a photo collage wall in my future home!
ReplyDeletelooks so great!! i love the d, super cute!
ReplyDeletexo, sarah grace
This looks awesome,love it!
ReplyDeleteX
Molly
thecottagediaries.blogspot.co.nz
Ooh what a great idea adding the letter. I want to do that!
ReplyDeleteThanks so much for linking up to The Pinspiration Project!
http://adayinthelifeofamomandawife.blogspot.com/2012/10/the-pinspiration-project-linky-party-9.html
Loving this! I've been wanting to do a gallery wall but had no idea how to figure out placement. This is such a great idea!
ReplyDeleteI love how you arranged the pictures! Everything looks awesome!
ReplyDeleteawesome! you could also check at goodwill for frames. though the dollar store looks like it had some good ones!
ReplyDeleteI love the addition of the letter - it's so cute!
ReplyDeleteThanks for linking up to The Pinspiration Project - Week #10 just went up today - hope to see you again!
i really want to do my gallery wall but i need frames! I have all these cute prints and pictures and banners...i just need the frames!
ReplyDelete