Saturday, September 29, 2012

A Peek into Kindergarten

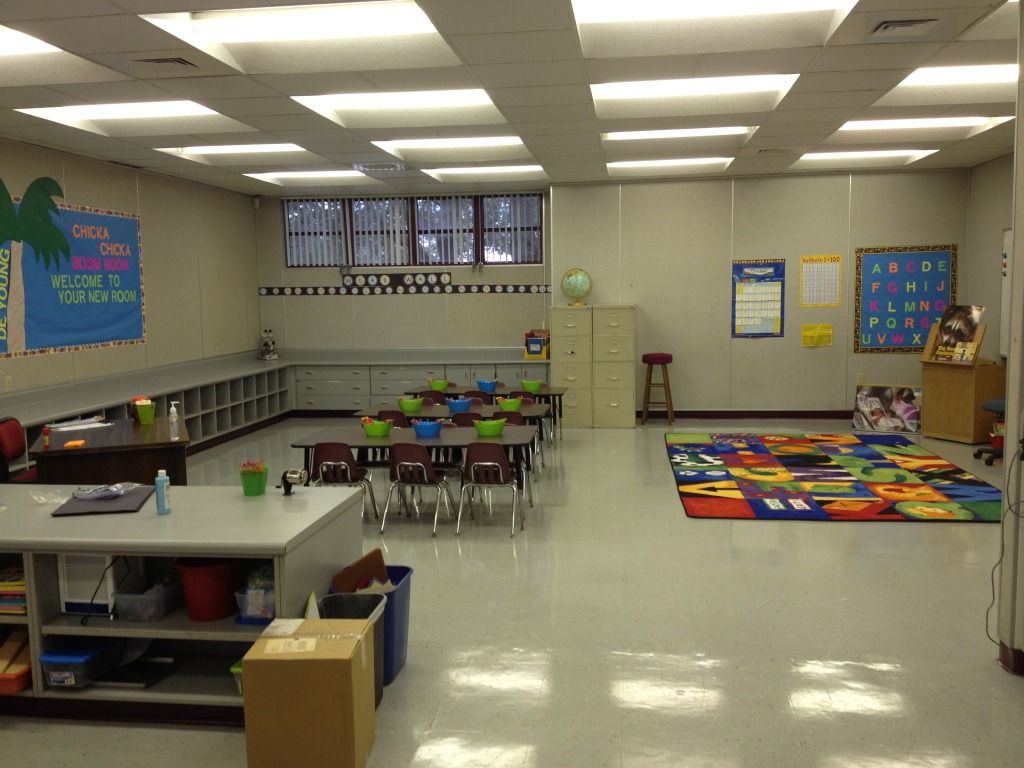
After two days of set up I have a classroom that's basically ready to go. 
The room is HUGE!! 
I kept adding things to the walls just to fill up the space.

 When you first walk in my door you can see my reading nook. I have a bunch of pillows that will go in here as well and I really need to buy a rug! The book bins have all the picture books for the students to read. The board will fill up as we begin to learn!


The next area on that same wall is my writing and computer area. Their papers will go into the wooden stand in the back along with all the writing materials as it's introduced. Their artwork will go on this wall as it's created. There are two computers on the built in desk, one is hiding.

Photobucket
The third space on my back wall is their main work area and my desk. The empty boxes will be their cubbies. Next to the blue bulletin board all will go their Chicka, Chicka Boom Boom trees with their names that we'll make sometime next week. The black poster will have their birthdays once I get the pictures for it.

Photobucket
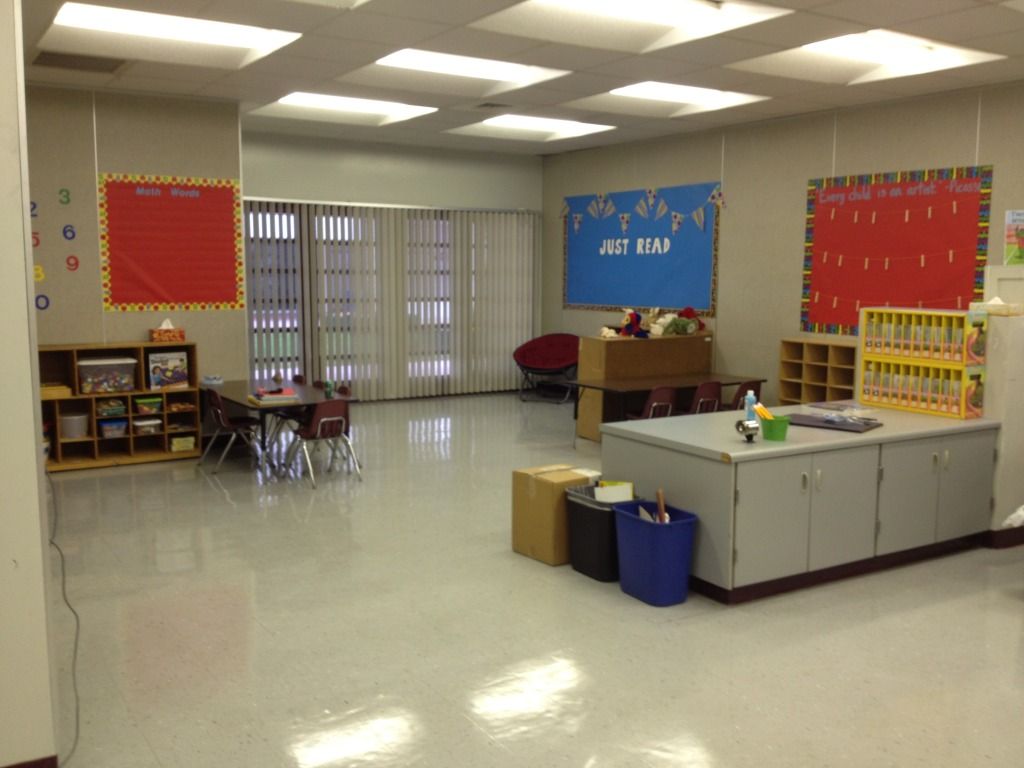
Here is the far wall from the center of the classroom. Told you it was big! Under the window is my word wall. The other wall has my calendar things and an alphabet wall. It's still missing a weather graph! I'll probably end up making one for this coming month while I search for one I like.

Photobucket
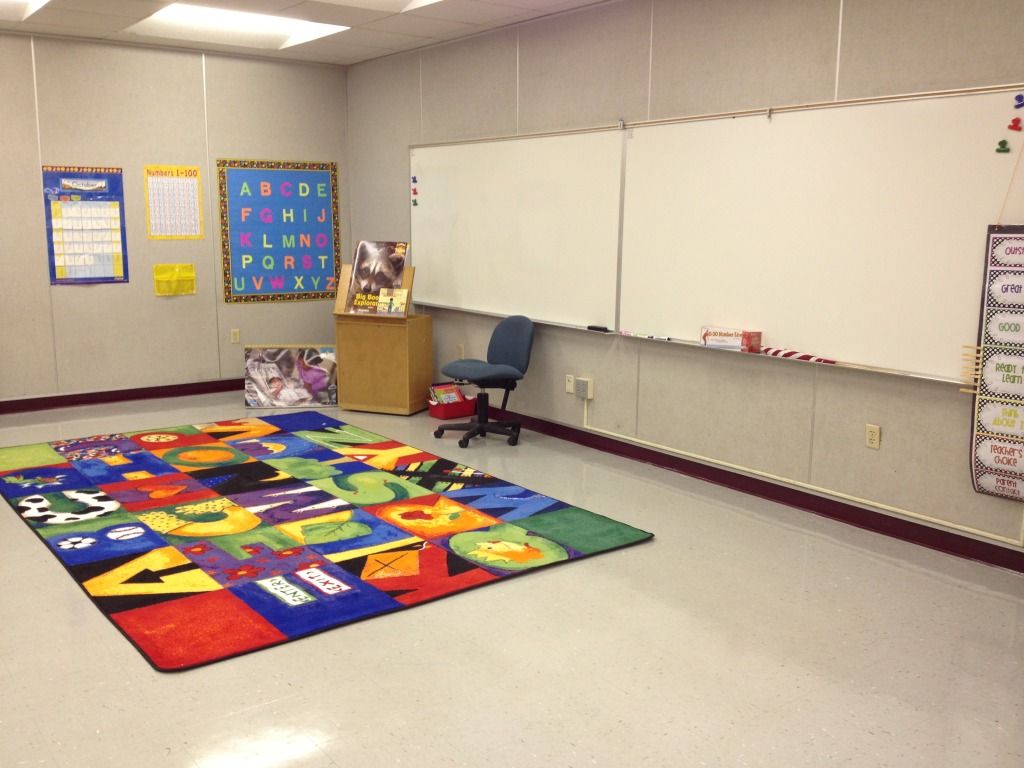
Closer up view of our whole group area. You can see my behavior chart on the far right.
Isn't this rug cute? All the letters of the alphabet made out of things that start with the letter. For example: A has an arrow, and K has a kite. It was waiting for me all brand new when I walked in on Thursday.

Photobucket 
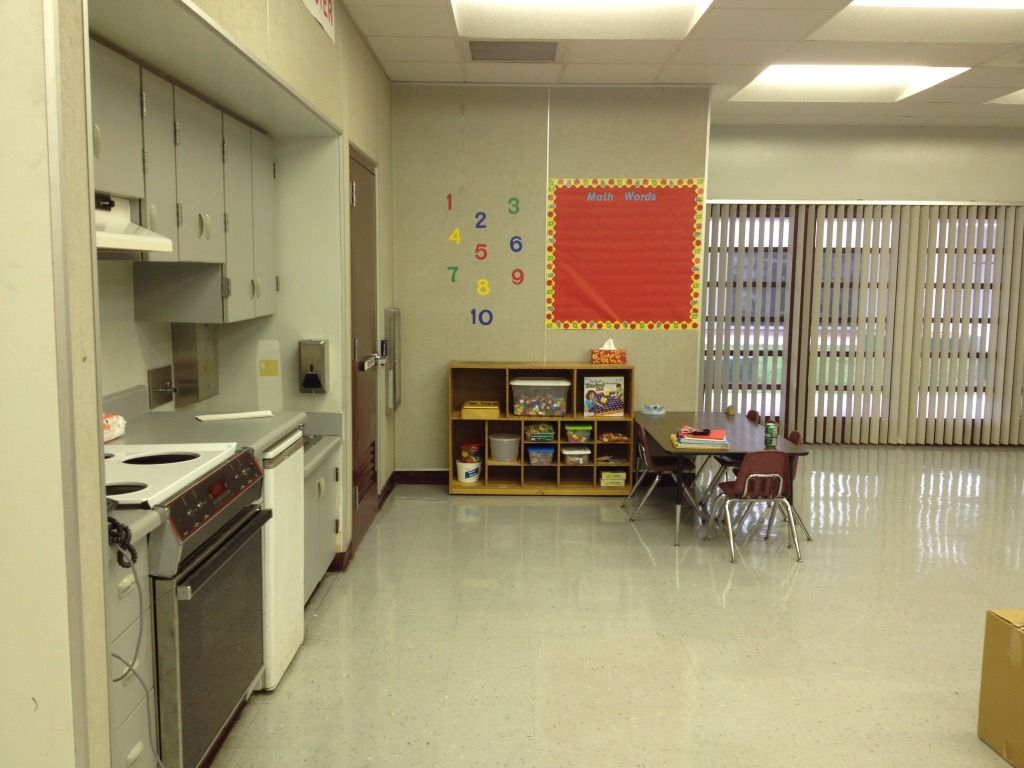
Here is the opposite wall. We have almost a full kitchen and a bathroom. This wall is my math center activities. It will also be my small group center for reading. 
 
Photobucket
Here is the other  half of the room from the center again. The gray cabinets are build in like that. The opposite side is open shelves with my word work activities.

Not pictured:
My front door, which is directly opposite the reading nook.
My storage closet which is on this small white wall you can see peeking out on the left.
And my TV, which will go on that same wall when it shows up!

I get to go fill out fun paperwork and go through meetings Monday, then Tuesday I'll start with my class!

Wednesday, September 26, 2012

First Day Jitters

Tomorrow is my first day in my classroom!
I'm excited and nervous all at the same time.
 I can't wait to start setting up!


Tuesday, September 25, 2012

Skittles Vodka Tutorial

When we first started talking about Kyle's birthday party, he really wanted to try some kind of fun drink.
Since neither of us really had any idea of what we would like we started looking.
I had heard of skittles vodka before, but didn't think much of it until then.
We decided to go ahead and try it. 
Photobucket
After the party...
Let me just preface this by saying it was a pain in the butt!

Ingredients:
60 skittles per color. Buy the regular size bag of skittles!
The recipe I found said a 1.75ml bottle of vodka. (You only need half that)
Some kind of glass jar.
Water bottles.

First, put 60 skittles of each color in a bottle. So 60 red skittles in bottle #1, 60 green skittles in bottle #2, etc.
Pour 6 oz. of vodka over the skittles. This will yield approximately 8oz.
Put the lid on and shake.
Allow bottles to sit until all the skittles have dissolved, shaking whenever you think about it.
We did a double batch of each color and it took around 2 days.

Now for the fun part.
Take one of your glass jars.
Put a funnel in it, and place a coffee filter inside the funnel.
Slowly pour one color of the vodka through the filter.
You want to get out all the white gunk floating on top.
The vodka literally never filtered through. I ended up having to squeeze it through the filter.
Not only that, but I strained it completely through twice and it could have used more.
Continue this till all the vodka has been strained.
It took me multiple hours for this part, and a few multi-colored fingers.
The colors do turn out pretty awesome though!

Once done freeze overnight and serve. We mixed them with Ginger Ale, Sprite, and Mountain Dew.


Saturday, September 22, 2012

The One With the Dumpster Incident

Anyone else have trouble sleeping without their husband?
Because I always seem to!
It's so weird how quickly that happens.

The other night I was consistently waking up as I waited for Kyle to come to bed. 
He finally came in, but seemed to be searching for something. 
Eventually, he asks me if I've seen his phone all night. 
So I call it and it goes straight to voice mail. 
That always seems like a bad sign.
Of course by this time I'm up and we begin searching. 
He checks the car. 
No phone.
Then he remembers that he threw a bunch of stuff in the dumpster on his way in.
There's no way it got thrown in too right?

He grabs a flashlight and peeks in the dumpster.
Photobucket
Kyle's phone at the very bottom of the dumpster.

So here we are at midnight trying to figure out how he's going to get his phone.
It quickly becomes apparent to me that there is no way he's going to be able to get himself back out if he goes in.

Photobucket
Trying to stay as far out as possible!
Woken up and forced into a dumpster. 
I think I should get an amazing wife award for this!
Sadly, Kyle just thought it was funny. 
Next time, his phone can stay 6ft down in a dumpster...


Thursday, September 20, 2012

Goodbye Lazy Days, Hello Teacher Pay!

I didn't talk too much about how much I had been struggling trying to get a job.
For one thing, not much was happening.
My county had a hiring freeze.
And then after school had been going on for while I just didn't want to answer everyone's questions.

On Friday I got a call about an interview for Wednesday.
Then on Tuesday I got another interview for Wednesday.
Two interviews, one day. 
I was super excited and super nervous. 
My first one took 10 minutes, that can't be a good sign.
The second one went wonderfully, but they didn't know when the position would be approved.
So I was still hopeful, but not expecting to hear anything. 
This morning I got a job offer to teach Kindergarten!
I'm so excited and can't wait for everything to go through so I can be in my classroom. 
Here's to being a first year teacher starting the 6th week of school.
SCARY!
Photobucket

Any teacher friends out there want to guest post about classroom experiences?
I'll be slightly crazy and stressed soon!
 

Tuesday, September 18, 2012

Homemade Reese's Cups

When I first started stalking pinterest I pinned this pin.
I knew it would be the perfect thing for hubs since he loves chocolate and peanut butter. 
Of course, I never did get around to actually making them. 

For hubs birthday I knew that I wanted to make him these homemade Reese Cups.
And they were surprisingly simple.
Photobucket

Makes approximately 3 dozen.
 In a pot over medium heat mix 1 cup creamy peanut butter, 1/4 cup butter, and 1/4 cup light brown sugar.
Stir continually until slightly bubbling.
Remove from heat. 
Add powdered sugar in 1/4 cup at a time mixing each time.
I would followed the recipe and used the full 1 1/4cups, however it became really crumbly.
I should have stopped at 1 cup because it had much better texture.
Let mixture cool.

Photobucket Line mini-muffin pan with muffin liners.
Mix 4 cups chocolate chips and 1/4 cup vegetable shortening.
Microwave on low for 30 seconds stirring each time.

Photobucket
Using a spoon, fill the bottom of each muffin liner with chocolate.

Place parchment paper on top of a cookie sheet.
Roll peanut butter mixture into balls.
Then flatten slightly to make discs.
I made mine the same size as the ones in the recipe, however, they were too big.
Make sure they only fit in the center of the muffin liner.
Otherwise the chocolate will not be able to get around them.
Refrigerate both the chocolate and peanut butter for 30 minutes. 
Once done, place the peanut butter disk on top of the chocolate. 
Cover completely with more chocolate. 
Microwave again if needed.
Make sure that the chocolate gets all the way down on the sides or the bottom wont connect!
Refrigerate again for 30 minutes. 

Keep in the fridge until ready to serve. 
They tend to get soft if left out too long.
These really do taste exactly like Reese's Peanut Butter Cups.

Photobucket
 
Linking up with Melissa, Amber, and Sarah


Monday, September 17, 2012

Why I'll Never be a Photographer

When I first got a digital camera at 16 I was thrilled!
I mean, it was still something that most people didn't have and I was one of the first of my friends.
Of course, I decided that meant I needed to document all of our amazing memories. 
One problem: I never took pictures. 
So the smart girl I am made sure to always have my camera and leave it out places. 
This way, I always ensured that I took pictures, or at least others did. 

Then I went to college and joined a sorority, and wouldn't you know, everyone had a camera!
 No matter what event we were at you'd have at least 20 girls wanting a picture of the same thing.
So I figured, why bother forcing some poor unsuspecting person to take just one more picture. 
I could easy steal them from facebook later right?
But then I never actually had the pictures that I wanted and vowed I'd be better at it.
So my camera permanently went with me. 
Then everyone else started getting even nicer cameras and my 7px camera just wouldn't do.

Now college is over and I don't even have sorority sisters to steal my pictures from anymore. 
I try to tell myself that getting a new, nicer camera will make me take pictures more often. 
But who am I kidding?

And so without further ado, 
Kyle's 25th Birthday in which I took no pictures of any of the guests.
I didn't even take a picture of the birthday boy. 
But I did take pictures of my pinterest inspired decorations!
Photobucket
Happy Birthday Banner!

Photobucket
Table backdrop!
  We had a wonderful weekend celebrating hubs birthday!
On Friday we relaxed, went to Tijuana Flats for lunch, and met up with his cousin for dinner at Chili's

Saturday was spent getting ready for the party!
I made a huge batch of pulled pork and there is still a ton left.
I also made baked macaroni and cheese.
Others brought some yummy queso and buffalo dips with tortillas!

For desserts we went all out!
I made an amazing Carmel Cheesecake dip that is so easy!
I also made Homemade Reese Cups, tutorial here.
There was of course ice cream and cookies as well.

We had a great time hanging out with friends, playing games, and watching The Avengers.

On Sunday, J came with us to church and we met up with another couple that goes there as well.
Everyone came over afterwards for leftovers.
We spent the entire rest of the day building settlements and cutting off each others chances of expansion.

Best game ever!


Thursday, September 13, 2012

High Five For Friday {9}

Photobucket 
1. Happy Birthday to the cutie-est husband in the world!
I am so blessed to be your wife and I can't wait to spend many more birthdays with you!
(Maybe even 100)

Photobucket Photobucket 
Can you tell he didn't want me to take this?
Photobucket
2. Kyle and I have talked for awhile about how we would like to start walking and getting exercise.
Lets be real, I might be small, but I am completely out of shape!
However, the last neighborhood we lived in wasn't the safest, and our walking choices were either a main road, or a unlit walkway with no sidewalk. We went with choice #3 and never did anything.
Now that we moved we both decided that this is something we need to do, so we started walking on Monday. We've successfully walked every day this week.
We're starting off slowly, but eventually plan to pick up the pace.

Photobucket
3. Pumpkin Spiced Latte's are love.
And a perfect pick-me-up on rainy days!
The barista said mine turned out so pretty she took a picture before she gave it to me!

Photobucket Photobucket
4. Kyle and I love watching all the way through TV Shows.
Friends is my absolute favorite! (I even own the entire box set)
After many years, I finally got Kyle to agree to watch the whole show with me!
Now he might understand what I'm talking about!
"Can I interest you in a sarcastic comment?"

Photobucket
5. This week, in honor of hubs birthday, get 25% off all ad spots.
Use the promo code: Kyle25


Surprise Fail!

Recently Kyle has begun to actually read my blog. 
It's pretty cute.
He even asks me to post about specific things so he can show people. 
Like this Skittles Infused Vodka chillin' in our freezer.
(Tutorial to Come)
Photobucket

However, this week has mostly consisted of working on little things to surprise hubs for his birthday tomorrow. 
On the off chance he decides to read this before then, you'll have to wait to see what I have planned. 
As you know, I'm horrible at keeping surprises. 
Seriously, not only did hubs choose his own birthday present, a blu-ray player,  he went with me to the store to pick it out and we've been happily watching it since August!
Therefore, I can't afford to let the few surprises left get out!

It's not that I'm bad at keeping surprises. 
I actually think I'm pretty decent. 
The problem is that hubs has this way of guessing/messing up my plans without even realizing it!

Like the surprise birthday party I was going to throw him. 
He started asking what we were going to do for his birthday. 
I tried to be all quiet and just say that something was planned. 
But then he wanted to know if his cousin was coming. 
So I said maybe.
And he knew I was lying.
Then he wanted to know if J. knew about the plans, which he did. 
And it just spiraled out of control from there. It didn't help that I didn't know his friends well enough to be able to invite everyone he would want...

Or the blu-ray player. 
I was going to buy him a wireless adapter for his xbox because we had a cord running through the house.
Then we had a problem with the internet, forcing us to move the adapter. 
Since we couldn't run the cord anymore, hubs looked at me and said, "I want to go get an adapter."
Surprise fail #2. 
It did work out though because he decided he'd rather move his xbox and get a blu-ray player.

And surprise fail #3.
Hubs has a website that he uses that sells cheap online games. 
He had been wanting to purchase a game on it for awhile, but hadn't.
I decided to go on early morning the day of his birthday and add money to his account so he could purchase it. 
Monday he wanted to know if I was okay with him adding money to his account.
Of course, there wasn't a good way to say no. 

All these surprise fails and it's not even his birthday yet!
So I'm holding tight to the last small things I have up my sleeves. 

Get ready for my birthday party tutorials! 
Thank you pinterest for making party planning a breeze.
Why were you not popular when I was planning my wedding?

Tuesday, September 11, 2012

DIY Paint Chip Calendar

If you spend any time on Pinterest, I'm sure you've seen some version of the Paint Chip Calendar.
I have been wanting to make one of these for awhile now, but never got around to it. 
There is a small wall in our office that I thought it would be perfect for. 
The best part about this project is that it's super cheap, mainly because you steal get most of it for free!
Photobucket

The first thing you need to do is go to your local paint place, I went to Walmart, decide what colors you'll be using. I chose to use a mix of colors, mainly because I couldn't decide between blues and greens. You need 35 squares for the dates so make sure you get enough samples. I was able to get two squares out of each sample, so I only needed two of each 12 colors. Now put them in your purse and slowly walk away.

I purchased one of the black plastic frames from Walmart that are $4. Mine was 12x16 because I chose to use 2x2 squares. Feel free to make your squares whatever size works best for you. I like lots of room to write.

Photobucket

Lay out your paint chips in the pattern that you want them to be in. I played around with mine till I had what I wanted. Now start cutting if needed. I cut my squares to 2x2, I didn't have a paper cutter so mine is definitely not perfect.

Photobucket 
Once you have them all cut out start gluing. I used Elmer's stick glue and it worked just fine.
You can either cut a piece of paper to fit your frame, or do what I did and flip the insert over.
I started at the bottom and measured it out so I have even spacing between all the squares. I worked my way up from there.
Photobucket
Once I had all the squares glued down, I measured how much space I had left on top for my days and month. I was left with ~1.5 inches.
I cut out seven 2x.5 rectangles for the days of the week and then cut out little triangles on each side to make it more decorative. I wrote the days on with sharpie and glued them above the squares.
Finally, I cut out another rectangle for the Month. I used the length of the paint chip and made it 1 inch high. I then cut out triangles from both ends. 

Photobucket 
I put it in the frame and then started adding information! I wrote the dates and month in sharpie so I wouldn't keep wiping it off as I wrote.

 *Tip: You can get sharpie off of things that use dry erase markers by fully covering the sharpie with a dry erase marker and wiping off like normal.  


Linking up with Melissa, Amber, and Sarah


Monday, September 10, 2012

High Five for Friday {8}

Not much has happened this week, so I've taken the opportunity to work on some crafts. 
Labor day weekend was nice, Kyle and I didn't do much, but we were able to spend some time doing things together. I babysat two of our little cousins and must say that I made an exceptional "Baby holding fairy princess soccer player" and yes, that was all at the same time! E. had a list of things for us to play and baby wanted to be held. What's a girl to do. We were also able to go to a family BBQ and Kyle got to hold the baby for the first time. I can not wait till we have our own children one day, Kyle is going to be such an amazing father. 

What I've done this week:

PhotobucketPhotobucket
1. I repainted the bathroom finally!!! It went from teal to a nice tan. I like it so much better now! I do still need to do some touch ups because whoever painted before us got paint all over the tile.

Photobucket
2. Kyle and I went to Joann's and got some great deals on fabric! 
My parents re-did their kitchen and gave us two of their old kitchen chairs for our porch. I bought this outdoor canvas to re-upholster the chairs in.

Photobucket
3. I also bought fabric to make a Maxi Skirt! My tutorial can be found here!

Photobucket
4. I've been wanting a calendar to hang, so I made this paint chip calendar. Tutorial here!
Photobucket
Recipe
5. I've been trying really hard to come up with some new recipes that fit Kyle's diet.
Last night, I made this no carb pizza. This is just the crust. Apparently we were too excited to eat it because I never got a picture of the finished dish!

I hope you've had a fabulous week!
Anyone have any Keto friendly recipes to share?

Linking up with Lauren at From My Grey Desk


Related Posts Plugin for WordPress, Blogger...