


Awhile ago I posted pictures of the decorations I made for a friend's bachelorette party. Today I'll show you how I made all of these pinterest inspired decorations!
Linking up with Melissa for The Pinterest Project
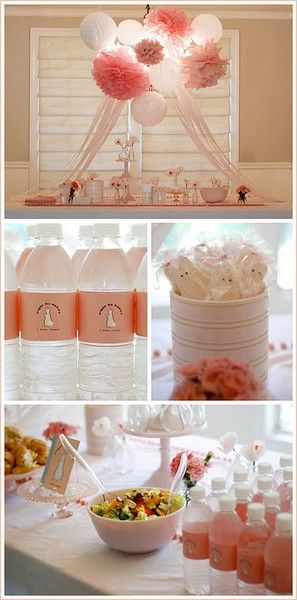
My inspirations for the projects. Click pictures to go to their site.
 | ||||
| My three finished projects (click the picture to read about the party!) |
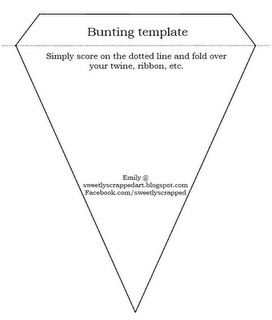
Project 1: Bunting banner!
Materials needed:
1. Card Stock
2. Template
3. Ribbon
4. Glue
5. Scissors/exacto knife
6. Hot Glue Gun
You can do this project with fabric as well, but I just wanted something simple.
1. Decide what you want your banner to say. I made a triangle for each letter, plus three extra for each size.
2. Trace template and cut out for each triangle.
3. Write, paint, cut out letters etc. for the wording. I cut out letters from another color cardstock and glued on.
4. Lay out triangles and measure ribbon to size. Make sure you leave room to hang it!
5. Score where the dotted edge is on the template and fold over.
6. Place ribbon inside fold and run a thin line of glue on the bottom edge of flap. Try not to get any on the ribbon in case you need to move your letters!
I also added bows right at the edge of my triangles so that they wouldn't move around.
This project is super easy, and can be used for anything. It was somewhat time consuming!
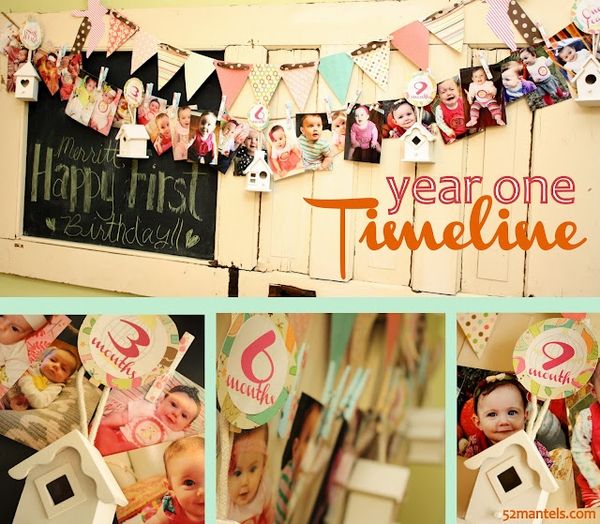
Project 2: Timeline
This is another super easy project.
Materials needed:
1. Pictures
2. Ribbon/twine
3. Mini clothes pins (can be found at Michael's)
4. Divider
I did a timeline of the bride and groom's relationship, but as you can see from my inspiration it can be used for anything.
1. Decide what your dividers will say. Mine had different memorable times in their relationship.
2. Choose your pictures and get them printed.
3. Make your dividers. I used the same triangles I had used for the bunting banner and hand wrote on them.
5. Hang up your twine! I couldn't beforehand and it was a pain to move after the fact!
6. Pin your dividers and pictures up!
Project 3: Tissue paper pom poms
These have become really popular recently. You can purchase kits with all the materials and just put them together your self, but you'd still be doing the same exact steps as if you'd made them yourself!
Materials needed:
1. Tissue paper ~8 sheets per ball
2. Floral wire
3. Scissors
4. Ribbon
If you want them different sizes you'll need to figure out the proportions to cut the tissue paper first.
1. Lay 8 sheets of paper on top of each other.
2. Fold up accordion style, about 1" sections. You can do this long or short ways.
3. Wrap floral wire around the center.
4. If hanging with ribbon tie the ribbon around the floral wire. It's much easier now than later!
5. Taking a sharp pair of scissor either round out your two small sides or make them pointed, which ever look you want. I did rounded.
5. Flatten out the accordion so it looks like a fan.
6. Carefully pull each sheet of paper up to the center, fluffing as you go till it looks like a ball. ( Be very gentle it rips very easily!)
7. Hang up and you're ready to go!!
Please feel free to contact me with any questions. I know it can be confusing since I don't have step by step directions!
Those look great! Like a lot of love went into them :) Great job.
ReplyDeleteI have been wanting to make a bunting banner! Thanks for this post! Your blog is super cute :)
ReplyDeleteYour newest follower,
-Jen
http://www.littlemissalizzi.com/
I have been wanting to attempt a banner..one of my little monsters has a birthday coming up..it would be perfect! Wonderfully done!
ReplyDeleteStopping by from the link up! New follower! YAY!! :)
Bri. @ no boys allowed.
noboysallowed1.blogspot.com
Thank you for linking up doll! This is so cute. I've been wanting to attempt one of these but haven't found the right occasion yet. I'm thinking for my dad's 50th bday this fall
ReplyDeletelove it!! i'm so glad you posted the info about the paper poms! i've been looking for a tutorial for that!
ReplyDeleteI love the bunting and poms - I've always wanted to do that! :) So cute :)
ReplyDeleteThanks for linking up!
The banner is such a cute idea! I'm a new follower :)
ReplyDelete-Sharon
The Tiny Heart
Enter to win a statement necklace!
This is so cute! I've always wanted to make one of those!!
ReplyDeleteThanks for linking up to the pinterest project!
These are some cute ideas, my daughters bday is coming up... def gonna use a couple!
ReplyDeleteThanks! Good luck with your decorating!
DeleteThis comment has been removed by the author.
ReplyDeleteSo stylish and very beautiful bachelorette party!! I swear the best thing is the party food. I am craving on it. You did an awesome job hosting this bachelorette party at the prettiest NYC venues rentals.Thanks for sharing it here with us anyway.
ReplyDeleteThis valuable appearances totally proper. Each one of minimal details have decided thanks to large number with practical experience simple awareness. I'm just excited them just as before significantly. strippers in Key West
ReplyDelete