 Linking up with Melissa at A Day In the Life of a Mom and a Wife for The Pinterest Project. Head on over and share your pinterest inspired projects!
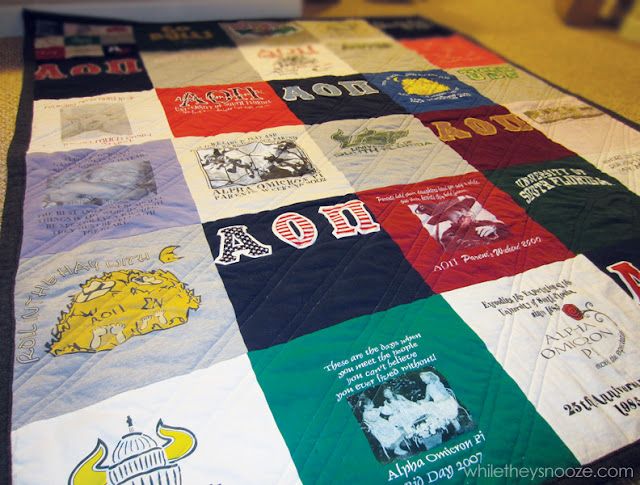 I had been wanting to make a t-shirt blanket with all my old t-shirts for awhile. I had boxes of them just waiting, but I can't sew. Everything I've tried has turned out miserably! So, I found this tutorial and modified it to make it more friendly, borrowed a sewing machine and was on my way! If I could make one of these in an afternoon anyone can make one!
I ended up making two blankets. After the first one I made some modifications to make it even easier. I'm going to share the directions I used for blanket #2, which I like better. Each blanket used approximately 30 t-shirts.
Materials Needed:
1. ~30 shirts. You only need 30 designs for this size, so you can use backs and fronts of the same shirt. Just make sure to cut the back and front apart before starting step 1.
2. Large piece of fleece or other sturdy material. Same size as your t-shirts. Mine was 5'x6'
3. Sewing Machine
4. Pins
5. Marker
6. 12x12 template
7. Needle
8. Thread
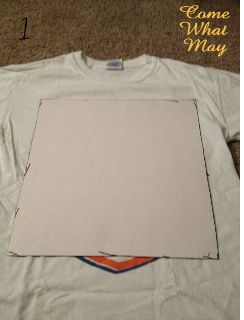 1. Make a 12x12 template. Lay on top of t-shirt design.
 2. Trace around template with a sharpie and cut out. You won't see the marker later!
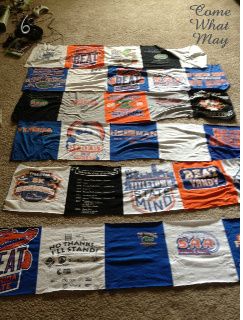
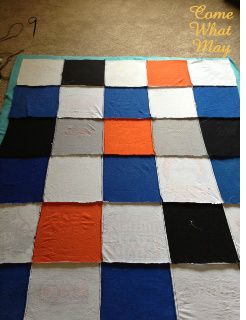
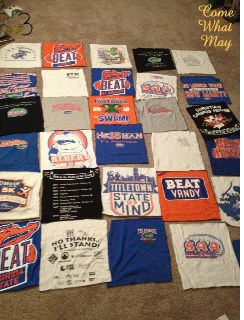 3. Once you have all of your squares cut out, lay them out and play around with them till you find a design you like.
 4. Starting at the top, lay the first two squares right sides together and pin along the side. Sew together using a 1/4" seam allowance.
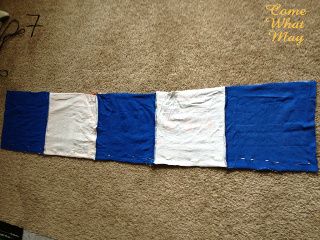
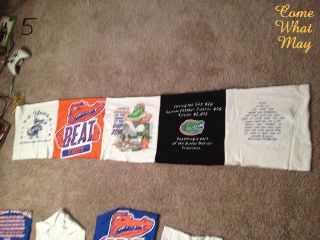 5. Continue till the whole row is stitched together.
 6. Continue to stitch together each individual row.
 7. Take the first two rows and lay them right sides together pinning along the side. Stitch together using a 1/4" seam allowance.
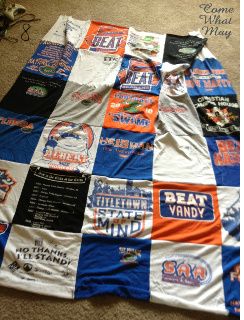 8. Stitch all the rows together until you're left with a large square. This will be the top of the blanket.
 9.Lay out your piece of fleece. Lay the top of your blanket down on top of the fleece.
 10. Pin all the way around leaving the side of one square open. I found that leaving one on the side open is a lot easier than a corner one. Sew all the way around using a 1/4" seam allowance. Pull out pins and pull the blanket through the hole you left. Hand stitch the hole.
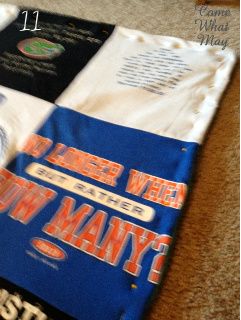 11. Lay the blanket down flat and pin all the way around. Run a top stitch around the whole blanket using a 1/4" seam allowance. This keeps the top from slipping around. Enjoy! See, super easy!! If you have any questions at all please feel free to contact me!


Very cool. Great work.
ReplyDelete~Danette
www.danettedillon.com
This is perfect! My dad's 50th bday is coming up in November in I'm going to raid his closet very soon to start a tshirt quilt like this for him. This is a better tutorial than some of the ones I've found. Thanks for linking up!!!
ReplyDeleteI have been wanting to make one of these with all our concert shirts. Thanks for sharing =D
ReplyDeleteI'm your newest follower
-Jen
http://www.littlemissalizzi.com/
That is so cute! My grandma made me a quilt out of all her old scrubs (she was a nurse for many, many years) for a graduation present and it is seriously my most prized possession. I've heard of doing baby clothes into a quilt and I've seriously hoarded so many of my kids' clothes. I'm gonna have to try this one!
ReplyDeleteThanks for linking up to The Pinterest Project :)
Okay....I really need to learn to sew haha! I love this!
ReplyDeleteFound you through the Pinterest Project link up
I saw your link from the Pinterest Project and thought I saw some orange and blue! Unfortunately you are a Gator fan, while here I was thinking you were an Auburn fan. (smh) I linked up too with a project for a Gator's fan! Go figure! ;) You do a lovely job sewing for someone who says they can't sew. I can only *dream* of such projects! ;)
ReplyDeleteAwesome idea!!!
ReplyDelete<3 Jamie
Thanks everyone!
ReplyDeleteJenn- this project is super forgiving! It basically not lined up at all, but you can't tell once it's finished.
This is amazing! You must have been at UF at the same time I was because I have all of these shirts!!
ReplyDeleteMaybe, I was there 2007-2012!
DeleteI really like this tutorial, it does a great job explaining! Did you sew along the seams of the shirts to attach it to the fleece or did you just sew around the outside of the blanket?
ReplyDeleteJust along the outside. They've held up extremely well.
DeleteSome tutorials I have read say to iron interfacing onto the back of the T-shirt’s. Did you do this? Would you recommend using interfacing?
ReplyDeleteFrom her pictures, it doesn't appear as though she did. I always use interfacing because the tshirts stretch and then it is a mess. The lines aren't straight.
ReplyDelete